
TL;DR
A micro display screen is a tiny, high-resolution panel, usually well under two inches across, that optics magnify into a large, sharp image. You find it in AR and VR headsets, camera viewfinders, thermal imagers and medical devices. The best choice depends on the technology, the optics and the job it has to do, not on a resolution number alone.
Quick Answer
A micro display screen is a miniature display, generally under about two inches diagonally, that is viewed through magnifying optics instead of directly. The main technologies are micro OLED, LCoS, DLP, micro LED and laser beam scanning. To choose one, compare resolution, pixel pitch, brightness, contrast, response time, interface and how well the panel works with your optical design.
Introduction
Hold a micro display screen next to a coin and it looks unremarkable. Many are smaller than a thumbnail. Put the same panel behind the right lens, though, and it can fill your view with an image that feels like a big monitor held at arm’s length.
That trick is why the micro display screen has become a core part of smart glasses, headsets, electronic viewfinders, night-vision devices and surgical cameras. It is also why picking one is harder than picking a phone display. The panel, the optics, the driver electronics and the heat budget all push on each other, and a weak choice in one area shows up everywhere else.
This guide explains what a micro display screen really is, how the main technologies differ, which specifications deserve attention and how to test samples before you commit. It is written for engineers, product managers and buyers who want a clear picture before they start reading datasheets.
What Is a Micro Display Screen?
A micro display screen, often written as “microdisplay”, is a very small electronic display designed to be magnified. Diagonal sizes usually run from a few tenths of an inch to a little over an inch, although the exact boundaries vary between suppliers and industry reports.
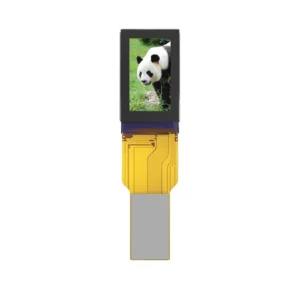
Most are built on a silicon backplane. A silicon chip carries the pixel circuits and driver logic, and the light-emitting or light-modulating layer sits on top. Semiconductor fabrication can produce very fine features, so the pixels can be tiny. A pixel pitch of 8 micrometers, for example, works out to roughly 3,175 pixels per inch (25,400 divided by 8). That is far beyond what a typical phone panel needs.
The key point is that nobody looks at this panel directly. The human eye cannot focus on something a few centimeters away, so lenses or other optics create a virtual image at a comfortable distance. In other words, a micro display screen is one half of an optical system. Its specifications only make sense once you know what optics will sit in front of it.
How It Differs From a Phone or Monitor
On the surface, a micro display screen does the same job as any other display: it turns an electrical signal into a picture. The differences come from how it is used.
Magnification comes first. Optics enlarge the image many times, so flaws that would never show on a phone become visible. Gaps between pixels can appear as a grid, often called the screen-door effect. Dead pixels, uneven brightness and color shifts stand out too.
Light is the second difference. Pancake lenses, waveguides and other optics absorb or discard a good share of the light that enters them. A panel that looks bright on a bench may look dim to the eye once it has passed through the full optical path.
Space and heat matter next. These panels live inside glasses frames, helmets and camera bodies, where there is little room for cooling. Power draw and temperature carry much more weight than on a desktop screen.
Timing is the last one. When a display sits close to the eye, delay between movement and image update can cause discomfort, especially in headsets. Low latency is a practical requirement, not a luxury.
The Main Micro Display Technologies
There is no single best technology. Each one trades brightness, contrast, size, cost and manufacturing maturity in its own way.
Micro OLED (OLEDoS)
Micro OLED, also called OLED on silicon, builds organic light-emitting pixels on a silicon wafer. Every pixel makes its own light, so a black pixel is simply off. This gives very high contrast and fast response in a compact package. The usual compromises are peak brightness, which is generally lower than what some other technologies can reach, and the cost of silicon wafers. Micro OLED is common in premium headsets and viewfinders.
LCoS
LCoS stands for liquid crystal on silicon. It is a reflective technology. The panel does not make light itself, so an external LED or laser source illuminates it, and the liquid crystal layer modulates that light pixel by pixel. LCoS can reach high brightness because the light source is separate, but the illumination optics add size and complexity. It appears in projection-style optical engines and in some AR designs.
DLP
DLP uses an array of microscopic mirrors that tilt rapidly to send light toward or away from the optics. It is a mature technology with a long history in projectors. For near-eye use, its optical engine tends to be larger than some alternatives, so it shows up more often in projection and specialized systems than in thin glasses.
Micro LED
Micro LED uses tiny inorganic LEDs as pixels. It promises high brightness and long lifetime, which makes it attractive for outdoor AR. The challenge is manufacturing. Placing or growing millions of microscopic LEDs with consistent color and few defects is difficult, and full-color panels remain harder to produce at scale. Availability and cost vary widely, so check what is actually shipping and not only what has been announced.
Laser Beam Scanning
Laser beam scanning (LBS) draws the image with a moving mirror and laser sources. It can be compact and offers a wide color range, but image uniformity, speckle and optical design need careful attention.
| Technology | Light source | Main strength | Typical trade-off |
|---|---|---|---|
| Micro OLED | Self-emissive | Contrast, compact size | Peak brightness, wafer cost |
| LCoS | External, reflective | Brightness potential | Larger optical engine |
| DLP | External, mirror array | Mature technology | Engine size for near-eye use |
| Micro LED | Self-emissive, inorganic | Brightness, lifetime | Manufacturing maturity, cost |
| Laser beam scanning | Laser plus scanner | Compact, wide color | Uniformity, speckle |
The table is a simplification, and individual products differ. Treat it as a starting map, then check datasheets. When comparing any micro display screen, remember that the technology label tells you less than measured performance in your own optical setup.
Specifications That Matter
Resolution and pixel pitch
Resolution is the pixel count, such as 1920 × 1080. Pixel pitch is the distance between pixel centers. Together with panel size, they set the pixel density. Because the image is magnified, pitch decides whether the viewer can see the pixel structure. A smaller pitch generally gives a smoother image, but it also demands more from manufacturing and sends more data per frame.
Pixels per degree
A more useful measure for near-eye products is pixels per degree (PPD), which combines the panel’s resolution with the field of view of the optics. A figure around 60 PPD is often cited as roughly matching normal visual acuity, though real perception depends on content and viewing conditions. A very high panel resolution stretched across a very wide field of view can still give a modest PPD. This is why a micro display screen should always be judged together with the optical design.
Brightness
Panel brightness is quoted in nits, but what the eye sees is lower once the light has passed through the optics. Waveguides and folded optics can lose a large share of it. A product meant for daylight needs plenty of headroom. Ask whether the figure is peak or full-screen, and under what conditions it was measured.
Contrast and color
Self-emissive panels can deliver deep blacks, which helps in dark scenes. Reflective panels depend more on the illumination and optics for contrast. For color, look at the gamut the panel supports, how stable the white point is between units and whether the supplier provides calibration data. Inconsistent color from one unit to the next is irritating in a consumer headset and a real problem in professional imaging.
Refresh rate and latency
Common refresh rates run from 60 Hz up to 120 Hz or more. A higher rate makes motion smoother and reduces perceived blur. Total latency also depends on the processor, the interface and the software, so the panel is only one link in the chain. Still, a slow panel makes every other improvement harder.
Size and power
A smaller panel allows a smaller device, but it limits the optical options. Power draw in an emissive panel scales with image content, while reflective systems also need power for the light source. Inside a sealed enclosure, all of it turns into heat. A micro display screen that looks efficient on paper can still be a poor fit if the thermal design leaves no room for it.
Interfaces and Electronics
Unlike a phone panel, a micro display screen rarely arrives ready to plug in. It usually needs a driver board or driver IC, a flexible printed circuit (FPC) for connection and carefully designed power rails. Common interfaces include MIPI DSI, LVDS, HDMI-based driver boards and parallel RGB, depending on the panel. Confirm the exact interface and timing in the datasheet instead of assuming.
FPC length, routing and shielding deserve attention, because noise can affect image quality. The host processor also has to output the panel’s native resolution and refresh rate cleanly. If a bridge chip is needed, that adds cost, board space and power draw. An evaluation kit from the supplier saves a lot of early debugging and is a fair thing to ask for.
The Optics Side
Think of the optics as the other half of the product. Several designs are common.
Eyepiece or magnifier optics use a stack of lenses to enlarge the image. This is typical in viewfinders and some headsets. Pancake optics fold the light path using polarization to keep headsets thin, at the cost of light efficiency. Birdbath optics combine a beam splitter and a curved mirror to overlay the image on the real world in AR glasses. Waveguides carry light through a thin piece of glass or plastic and release it toward the eye. They allow slim glasses, but they need bright, well-matched display light.
Coatings matter as well. Anti-reflection coatings reduce ghost images and stray light, which protects the contrast a good panel can offer. An anti-fog treatment on outer surfaces helps in humid or cold conditions. Because panel and optics interact so strongly, experienced teams specify and test them together. A micro display screen that excels in one optical setup may look average in another.
Where Micro Display Screens Are Used
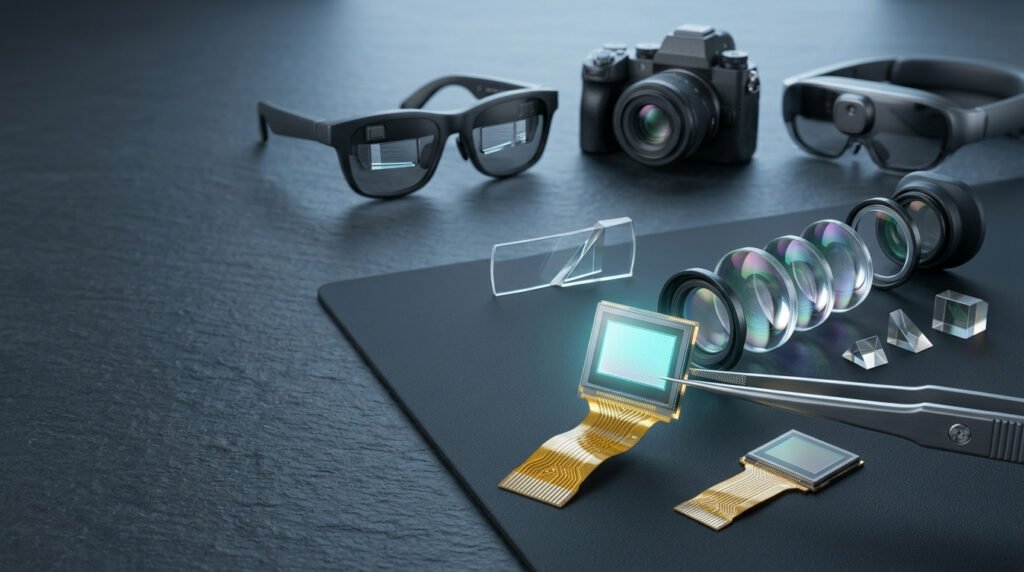
Augmented and virtual reality are the most visible markets. Smart glasses and mixed-reality headsets place a micro display screen behind a waveguide or pancake lens. Electronic viewfinders in mirrorless cameras use one behind a magnifying eyepiece, and cinema cameras often accept external viewfinders built the same way.
Beyond consumer products, thermal imagers and night-vision devices use these panels for compact displays that work in the field. Helmet-mounted and head-up displays use them for aviation and defense. Medical equipment, including endoscope camera systems and surgical microscopes, uses them where a clear, small display is needed close to the eye. Industrial inspection tools and wearable computers are other examples.
These fields have different priorities. Consumer products care about cost and comfort, medical devices about reliability and image accuracy, and outdoor or defense uses about brightness and temperature range. The same micro display screen is rarely best for all of them.
A Hypothetical Design Scenario
Here is an invented example to show how the decision process works.
Imagine a small team building lightweight smart glasses for warehouse workers. The workers read short instructions and scan barcodes, mostly indoors but sometimes near loading doors in bright daylight. The glasses must be comfortable for a full shift, which limits weight and heat.
Instead of starting with panels, the team sketches the optical design, a waveguide, and works out how much light it will pass. That tells them how bright the micro display screen needs to be at the source. They shortlist two options: a micro OLED with excellent contrast but lower peak brightness, and a brighter alternative that needs a larger light engine.
Early prototypes show that the micro OLED looks great indoors but washes out near the doors. The brighter option handles daylight but makes the frames bulky. Neither is perfect. The team decides based on where workers spend most of their day, which is indoors, and plans a dimmable lens to handle the doorway moments.
The lesson is simple. The decision came from the use case and the optics, not from the biggest number on a datasheet.
How to Choose a Micro Display Screen
A reliable way to choose a micro display screen is to work from the outside in.
Start with the use case. Where will the product be used, for how long and by whom? Indoor or outdoor, consumer or professional, glasses wearer or not? These answers shape every later decision.
Define the optical requirements. Field of view, eye relief, magnification and the efficiency of the optical path set how much light and how many pixels you need.
Translate that into panel requirements. From the optics you can work out the panel size, resolution, brightness and contrast the design needs.
Match the technology. Compare micro OLED, LCoS, micro LED and the others against those requirements and against your thermal and size limits.
Check electronics and interface fit. Confirm that your processor supports the panel’s interface and timing, and decide whether a bridge chip or custom driver board is acceptable.
Look at supply and cost. Ask about lead time, minimum order quantity, long-term availability and who provides technical support.
Teams that start from price alone often end up redesigning the optics or the board later, which costs far more than any saving on the panel. When you compare suppliers of a micro display screen, ask each the same set of questions so the answers are comparable.
Testing Samples Before You Commit
Datasheets describe the best case. Real samples tell you the rest. Test every candidate inside the actual optical assembly and not only on a bench.
Measure brightness and uniformity across the panel, and check white point and color accuracy. Inspect for pixel defects against the criteria you agreed with the supplier. Look for flicker, since some panels control brightness with pulse-width modulation. View static test patterns for a while to check for image retention on emissive panels. Test alignment too, because a panel that is slightly off-center or tilted relative to the optical axis can make one side of the image look soft.
Environmental checks, such as temperature cycling and humidity, show whether the module behaves in the field as it does in the lab. Once you have a production routine, apply the same inspection standard to each micro display screen that arrives.
Supply, Customization and Lifecycle
Standard panels cover many projects, yet some products need changes: a specific FPC length or connector, a different orientation, tuned brightness or gamma settings, or a modified driver board. Custom work usually means longer development time and higher minimum quantities, so decide early whether it is truly needed.
Supply continuity deserves just as much attention. Many devices stay on the market for years, and a panel that goes out of production forces a redesign. Ask suppliers about lifecycle plans and last-time-buy policies. For any micro display screen program, also check the export and compliance requirements that apply to your target markets, and consult qualified advisors where needed.
Common Mistakes
The first mistake is picking by resolution alone, without checking whether the optics can resolve it or whether PPD actually improves. The second is trusting the brightness number without accounting for optical losses. The third is leaving interface and driver decisions until late, which creates schedule risk. The fourth is skipping supplier questions about lifetime, defect criteria and long-term availability. The fifth is judging the panel in isolation instead of as part of a module.
Most of these come from treating a micro display screen as a standalone component. It performs best when optics, electronics and mechanics are designed around one another.
Where the Technology Is Heading
The general direction is easy to see, even if exact timelines are not. Resolutions and refresh rates keep climbing, makers continue to work on brighter output and driver electronics keep shrinking. As production matures, costs tend to fall, which can open the door for micro display screen designs in more everyday devices. Micro LED is the one to watch for brightness, while micro OLED remains the benchmark for contrast and compactness today. Check current availability before you plan a product around any single technology.
Conclusion
A micro display screen is a small component with a big influence on how a product feels. The technology you pick sets the trade-offs between brightness, contrast, size and cost. The specifications that matter most, such as pixel pitch, PPD, real brightness at the eye and latency, only make sense alongside the optics.
The most dependable path is to define the use case first, work out the optical requirements, then match the panel and test real samples in the real assembly. If you are evaluating a micro display screen for a new product, request datasheets and samples from more than one supplier and ask each the same technical questions before deciding.
Frequently Asked Questions
What is a micro display screen?
It is a very small display, usually under about two inches diagonally, that is viewed through magnifying optics. It is used in AR and VR headsets, camera viewfinders, thermal imagers and medical devices.
Which micro display screen type is best for AR glasses?
There is no single answer. Micro OLED offers strong contrast and compact size, while micro LED and LCoS can reach higher brightness. The right choice depends on your optics, your outdoor brightness needs and your size and heat limits.
What is the difference between micro OLED and LCoS?
Micro OLED pixels produce their own light, which gives deep blacks and a compact design. LCoS is reflective and depends on an external light source, which can allow higher brightness but needs more optical hardware.
What does pixels per degree (PPD) mean?
PPD is the number of pixels that fall within one degree of the viewer’s field of view. It combines panel resolution and optics, and it describes perceived sharpness better than resolution alone.
What should I ask a supplier of a micro display screen?
Ask for the datasheet, interface details, pixel defect criteria, lifetime test conditions, lead time, minimum order quantity, lifecycle plans and whether an evaluation kit is available.